MDF seems to be the one thing that scares most people whenever they need to screw into its edge. I have been a cabinetmaker for the last 20 years and screwing MDF together is something we did every day.
All of the apprentices would be always asking how to screw into the edges of MDF without it splitting?
MDF can successfully be screwed together without it splitting by using a pilot hole before driving the screw in. Ordinary straight shanked wood screws can be used in MDF.
Medium Density Fibreboard or more commonly known as MDF is a great product to have around the workshop. It comes in sheets and has a very flat and smooth surface and is ideal for making jigs, templates, or even boxes.
Pro-Tip 💭
Many people say you need special screws for screwing MDF. After 20 years of screwing MDF cabinets together, I can assure you this is not true provided you always use a pilot hole. If you would like to ensure you are using good-quality screws that work every time, I recommend these screws I get from Amazon.
Although it is very handy to have around, many people struggle when screwing it together as it is very prone to splitting and the screws not holding well.
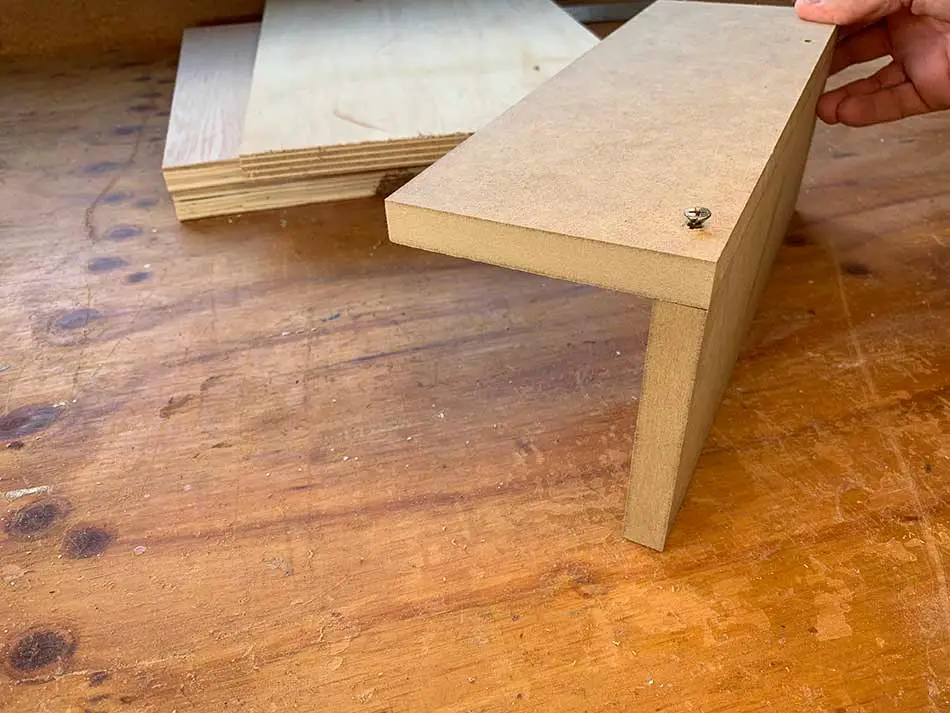
From my years of experience with the product, I have put together these 9 essential tips for screwing together MDF that will avoid splitting and result in strong joints every time.
- Use a good quality MDF that has a good density
- Always pre-drill with a pilot hole that is the right size
- Ensure the pilot hole is deeper than the length of the screw
- Always use a countersink bit
- Use of a clearance hole is recommended
- Keep screws 3″ (75mm) in from the ends of the MDF
- Do not overtighten the screws
- Ensure you are drilling into the center of the MDF edge
- Use Straight-shanked screws
Keep reading below to find out more about each of these items.
Why Does MDF Split When You Screw It?
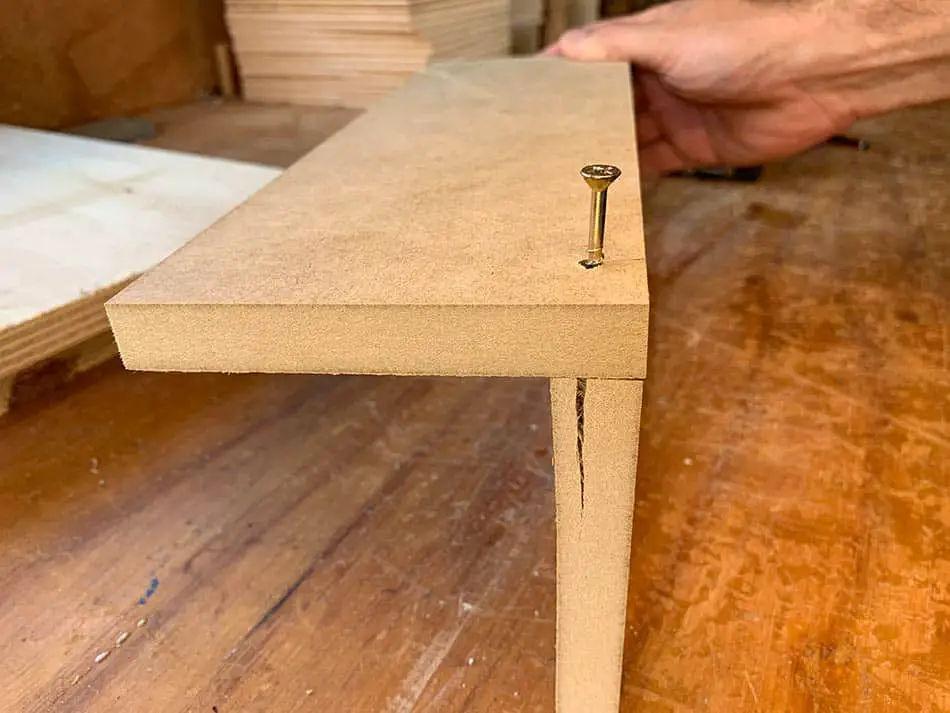
MDF splits when you screw it because the screw acts as a wedge and forces the fibers inside the MDF to separate. Splitting occurs when a pilot hole is not used.
MDF is a man-made product with wood fibers being glued together with a synthetic resin. All of these ingredients get combined and are pressed together inside a giant press.
Be sure to check out my article explaining can you use pocket holes on MDF?
From this manufacturing process, it is much easier to see why MDF splits. It requires a little extra care when screwing together which I will cover below.
How To Screw MDF Without Splitting?
The edges of MDF can be screwed into successfully without splitting provided an appropriately sized pilot hole is used and the screw is not tapered.
The edges of MDF are what cause the most problems for beginners. Due to the fact, the screw can act as a wedge, it is very important to ALWAYS use a pilot hole when you need to edge screw MDF. Check out how to determine the best size pilot hole here.
Face screwing into MDF is not as bad. You can easily screw into its face without ever worrying about it splitting. I do however use a pilot hole on occasions for this depending on the situation.
What do you do with your leftover scraps of MDF? Can you burn MDF? I wrote this article to reveal the truth!
I recently did a poll in a popular Facebook group to discover what their fears were with MDF.
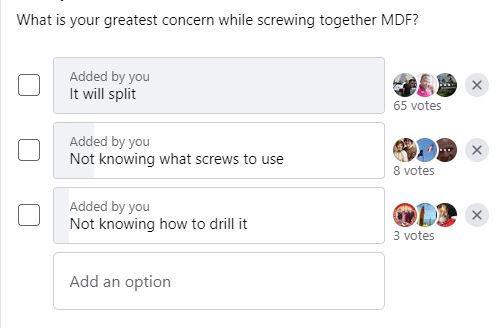
As you can see, the overwhelming majority have concerns about MDF splitting when they screw into it. The goal of this article is to help relieve some of those concerns.
Here Are The 9 Essential Tips To Successfully Working With MDF
1. Use A Good Quality MDF That Has A Good Density.
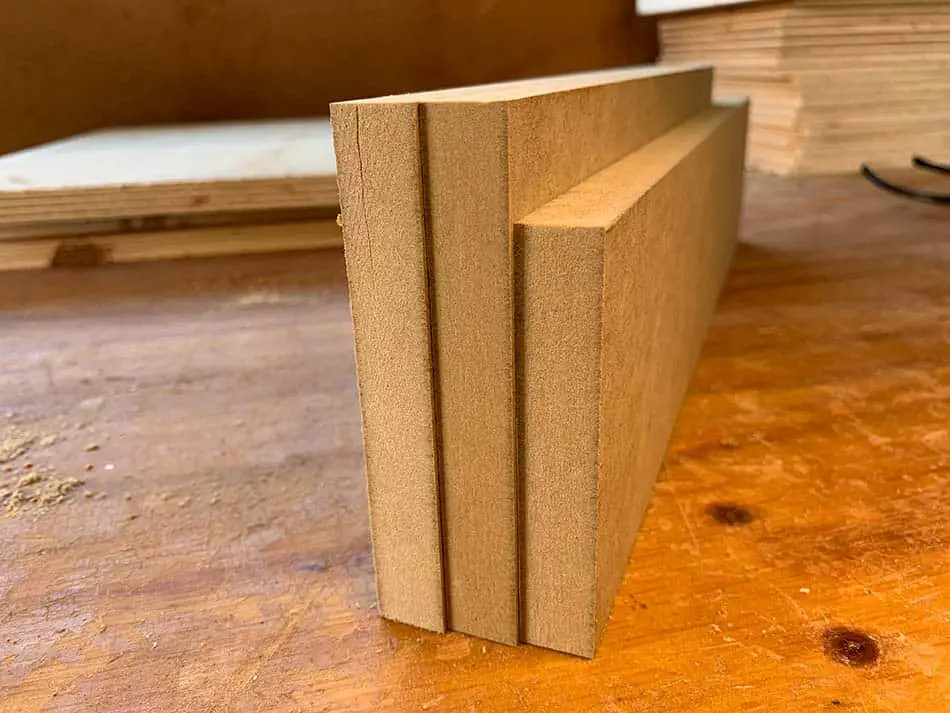
MDF can be bought at most stores, and depending upon their manufacturer, it can also come in different types of density. The most common MDF has a typical density of 600-800kg/m³ or 0.022–0.029 lb/in3.
Some places sell cheap MDF which usually has a lower density. This will mean that the compaction during the manufacturing process was considerably less. Cheap MDF’s with low density will always be harder to work with as these will split very easily when screwed.
For this reason, I always recommend you opt for a higher grade of MDF or “standard” at the very least. The higher density will make your life much easier when it comes time to screw it together.
A higher density MDF is also very important in regards to strength and how well it is likely to hold your screw long term. Cheap low-density MDF will not hold screws given any movement over time.
Below is an example of the different grades of MDF and how to spot them.

2. Always Pre Drill With A Pilot Hole That Is The Right Size.
Whenever working with MDF, you should always pre-drill your screw holes every time! This is the most common problem beginners have which usually leads to MDF splitting. Using a pilot hole to suit your screw is the single best thing you can do to ensure success!
Below are the steps to take to select the right size pilot hole:
- Select the type of screws you intend to use
- Select a drill bit that is the same size as the shank of the screw
- Hold the drill bit and the screw up to the light to check you have the right size.
- Ensure the hole is not too big that the screw threads won’t bite into the MDF
- Try on a scrap piece first.
Here is a video that explains the process.
If you prefer to use a chart to select the right size pilot hole, be sure to check out my article on selecting the right size pilot hole every time.
A pilot hole will ensure that the screw threads bite and hold into the MDF rather than wedging the fibers apart which causes splitting.
3. Ensure The Pilot Hole Is Deeper Than The Length Of The Screw
A pilot hole is only going to be useful when it is drilled to suit the length of the screw that will protrude into the MDF.
It is very common for people to drill pilot holes that are only partial to the length of the screw. This is not helpful as the remaining part of the screw can cause the MDF to split.
I would recommend it is good practice to drill your pilot hole slightly deeper than the length of your screw. This will ensure that no splitting will occur even if you accidentally drive your screw in too far.
For example: if your screw protrudes into the MDF by 2″ (50mm), I would drill your pilot hole to be 60mm deep.
Did you know you can sand MDF? My article explains this in great detail.
4. Always Use A Countersink Bit
This is not as important as drilling a pilot hole but can certainly improve your chances of getting a quality finish.
A countersink bit simply provides relief for the head of the screw to seat into. This ensures that the head doesn’t force the MDF fibers apart when you tighten down the screw.
This is particularly important when screwing near the edge of MDF. A countersink bit also gives your product a nice professional look and it can aid in providing a neat hole if you were going to fill your screw heads.
Pocket holes in MDF. Do they work? I wrote about this making it easier to understand.
5. Using A Clearance Hole Is Recommended
A clearance hole is not the same as a pilot which I talked about earlier. A clearance hole does exactly what it says, and provides clearance to the shank of the screw in the primary surface you are screwing through.
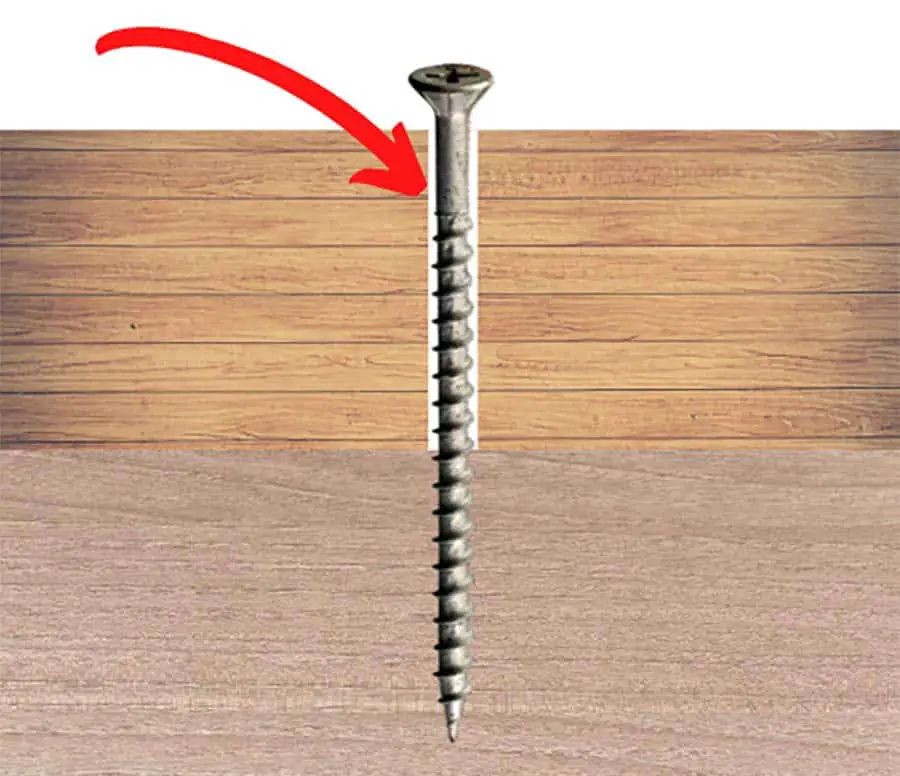
A clearance hole will also provide relief for the screw when it is tightened down to ensure the MDF does not split. Generally, you would be screwing through the face of a piece of MDF into the edge of another piece of MDF.
Always use good-quality dust collectors when using MDF. I wrote an article showing what the best dust collector for MDF is. Check it out.
Clearance holes also provide some room for aligning your joints after you have screwed them together. A small tap with a hammer will get your joints lining up perfectly.
If you had only used a pilot through the primary piece, you would not have that clearance to adjust your joins.
6. Keep Screws 3″ (75mm) In From The Ends Of MDF
MDF fibers will tend to be weaker near the ends of the board as these fibers are unsupported. When screwing into MDF, you should always keep the screws 3″ (75mm) in from the ends of the board. This will drastically reduce the chances of it splitting.
Although I still highly recommend you use a pilot drill when screwing into MDF regardless of where your screws are positioned.
MDF can easily be planned. See my full guide on how to plane MDF.
This rule also applies to any wood you plan on screwing together. Keeping the screws in from the ends can prevent splitting in real wood and it makes your finished project look better.
I don’t know why, but beginners always try to put screws right next to the ends. This is unnecessary and unprofessional. Try moving those screws in and you will be glad you did!
7. Do Not Over-tighten Your Screws
Because MDF is made from pressed wood fibers, it will not be as strong in the edges as real wood is. For this reason, just tighten your screws up firm but do not try to overtighten them.
Overtightening will result in the screw threads pulling through the MDF and stripping out your screw hole.
Tips For Applying Just The Right Tension
A quick tip for applying the right tension or tightness to screws is to use the clutch on your cordless drill. The clutch is the turnable collar at the front of the drill with the numbers around it. The clutch is there to prevent you from over-tightening your screws!
Turn the collar to the lower numbers and your drill will make a slipping sound when you try to drive in a screw. If you turn it to a higher number, you will be able to drive your screw in further before it slips.
Just experiment with the clutch setting that works best for you.
8. Always Drill Into The Center Of The MDF Edge
If you can drive your screw into the center of the edge of the MDF, your chances of splitting it will be significantly less. If your screw wanders off or you drilled in the wrong spot, there may not be enough wood fibers near the outside edge to support the screw.
This will result in split MDF or you may even cause a breakout on the outside surface. Both of these situations will not only look bad but will result in a very weak joint.
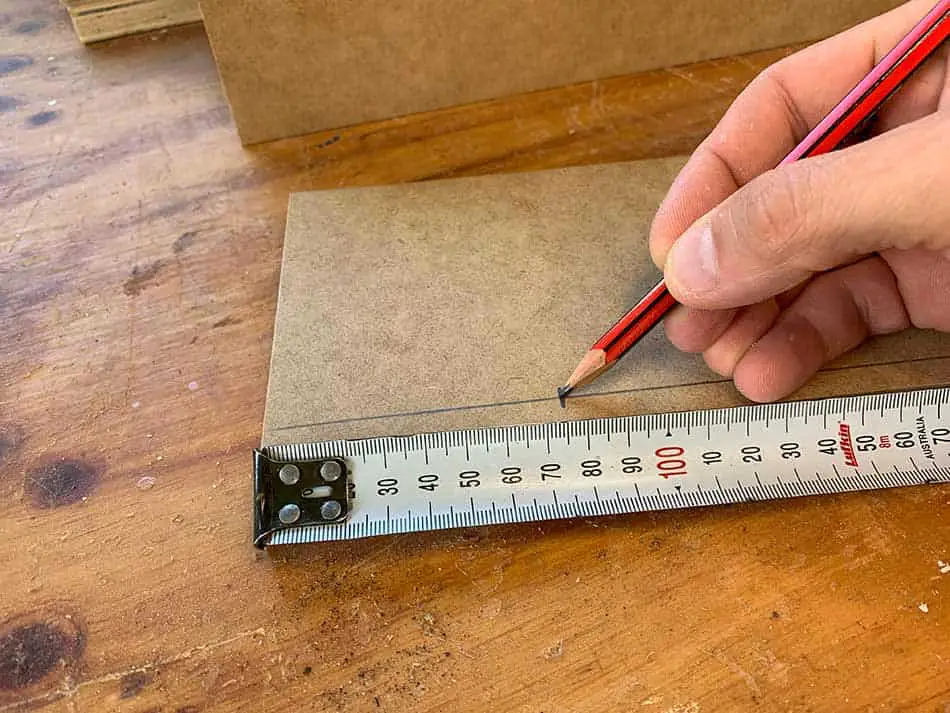
To ensure you are drilling into the center of the MDF, always measure the thickness and divide that by 2. Mark that measurement with a pencil to ensure accurate and neat joints.
For example, a common thickness of MDF is 5/8″ (16mm). I would take a pencil and mark 5/16″ (8mm) in from the edge to ensure the screw will be dead center each time.
9. Use A Straight Shanked Wood Screw
I would always recommend using a straight shanked wood screw in MDF as opposed to a tapered variety. The reason for this is the tapered wood screw will act as a wedge when driven in and will force the wood fibers to separate.
The tapered wood screws are mostly the old style of screws and are not commonly used these days in woodwork.
No matter what screw you choose to use, always drill a pilot hole just to be sure.
Can you cut MDF with a jigsaw? I reveal if it’s possible here.
Best Screws For MDF?
The best screw for MDF is any straight shanked screw with medium to coarse threads and its length is a minimum of twice the thickness of the board being screwed.
For example, if you plan on screwing through a piece of MDF that is 5/8″ (16mm) thick, then the ideal screw length would be at least 40-50mm long. The reason is you need as many threads as possible in MDF to ensure a nice stronghold on the fibers.
Pro-Tip 💭
Many people say you need special screws for screwing MDF. After 20 years of screwing MDF cabinets together, I can assure you this is not true provided you always use a pilot hole. If you would like to ensure you are using good-quality screws that work every time, I recommend these screws I get from Amazon.
Coarse threads are also beneficial for MDF as it allows the threads to bite deeply into the fibers and ensures a stronghold. Screws with fine threads would slip easily as soon as any pressure is applied when tightening.
Spax Wood Screws
There seem to be a lot of people that suggest the screws from Spax are the best for MDF. The truth is they are really just mimicking what you could achieve by drilling a simple pilot hole.
Spax screws have a drilling tip on them and course ribbed type threads which basically cuts the MDF fibers. The theory is these things will help prevent the splitting of the MDF.
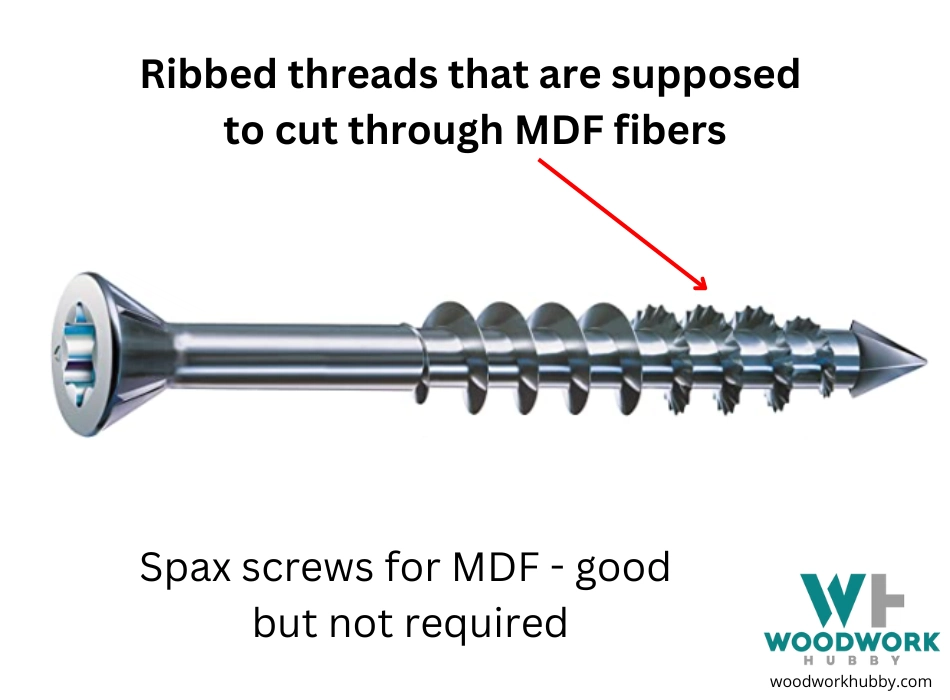
After 20 years of screwing MDF, I suggest you save your money and use regular wood screws (not tapered variety) and use a pilot hole! Send me a message if you think I am wrong.
Do Wood Screws Work On MDF?
Wood screws work well in MDF provided they are not tapered and a pilot hole is used before inserting them.
In fact, a pilot hole should ALWAYS be used when screwing together MDF. This provides a strong joint and eliminates splitting. Wood screws generally always have a courser thread as well which is very beneficial.
Chipboard screws are another great screw for MDF as they are straight shanked and they have a coarse thread.
The 9 rules stated above still apply when using wood screws in MDF.
Can I Use Drywall Screws In MDF?
Drywall screws are not recommended for screwing into the edges of MDF because the threads are too fine and they don’t grab or bite into the fibers very well.
Drywall screws may be ok for face screwing but I would still prefer a wood screw that is 8 gauge. Drywall screws are also quite brittle and may not hold up to stress over time.
For best results, try to use an ordinary wood screw that meets the criteria listed above. You can buy special screws for MDF but I consider these a waste of money as ordinary screws work perfectly fine if you follow the above procedures.
Does MDF Hold Screws Well?
MDF will hold a screw well provided the MDF has a high density and the screw is long enough to engage three-quarters of its thread count inside of the MDF. A pilot hole should be used and provided the screw does not get overtightened, it will hold extremely well.
In my 30 years of experience in a cabinetmaking shop, provided that all of the above steps have been followed, I have never seen a screw pull out of MDF provided some unforeseen excessive force was not applied to the parts.
I know most people hate MDF and it certainly does require attention to safety equipment while machining it, but it does have many good uses. I especially like it for jigs and basic box constructions as it’s very flat and stable. Provided it is not put near water of course!
MDF does certainly not have the beauty and elegance of solid timber but it is handy to have around the workshop and can be screwed successfully once you apply the steps mentioned in this article.

