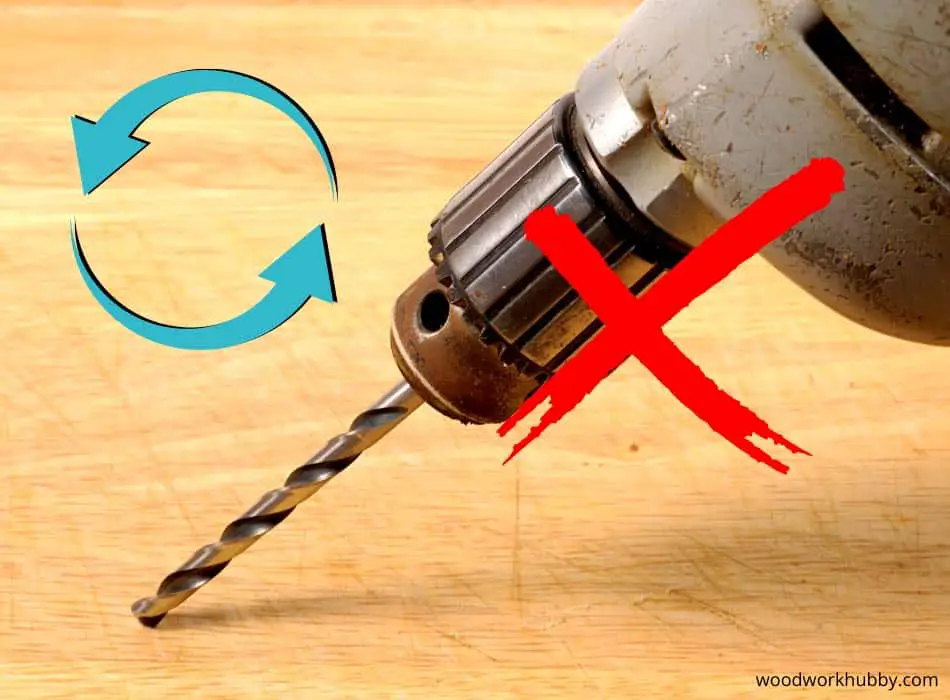
These days drills are one of the most commonly used tools in my shop. I find it frustrating when you are in the middle of a project and the drill decides to stop spinning. It can happen on any kind of drill which makes us ask the question why does my drill stop spinning?
Drills stop spinning due to the chuck coming loose or the internals of the drill are damaged. In such cases, inspect the gear case, transmission, spindle, knobs, gears, and chuck. These are the common parts that can cause this problem and may need a replacement or adjustment.
In the next sections below, I will go over each of these parts and other potential trouble points. I’ll show you some of the symptoms to look out for. I’ll also explain how to replace the part of the drill that may be failing.
Is The Drill Bit Not Spinning or The Drill Itself?
First, you need to determine which problem you are having as there is a multitude of things to look for. When you start drilling into a piece of timber, does the drill bit stop spinning even though the chuck is turning?

Or is the drill itself randomly stop spinning? If this is the case it could be a loose chuck or a faulty drill. Let’s look at each of these topics below.
Why Does My Drill Bit Not Spin?
In general, a drill bit may slip or not spin if the chuck has not been tightened properly. An electric drill with a keyed chuck needs to be tightened in at least 2 hole locations. While a Keyless chuck should be done up by hand in which you will hear it clicking.
Many people are not aware of how to tighten a chuck properly and this is the most common cause of drill bits slipping. I have detailed each of these below.
Using a drill-on hammer can cause the chuck to loosen. See my article on Cordless drill going through brick.
Keyed Chuck
To ensure adequate tension on the drill bit, you need to use the key and tighten it in each hole location of the chuck. All chucks have 3 holes and you need to use all of them.
I guarantee you will tighten the chuck and one hole and think you are done. When you try the second hole, you will notice you can get a little more tension on it. Now continue and use the 3rd hole as well.
Keyless Chucks
To tighten keyless chucks, we all just hold the chuck and pull the trigger. Am I right? Yes, this is good to start with. To get it properly tightened, you need to do the following:
- Hold the drill with one hand
- Use the other hand to turn the chuck counterclockwise.
- You will hear the chuck clicking as it gets tightened
- Once it’s as tight as you can get it, turn the chuck clockwise a small amount and you should feel the chuck click into place.
- This ensures the chuck is completely securing the drill bit
Is The Drill Chuck Loose?
Most chucks are fixed to the actual drill via a large reverse-threaded screw located in the bottom of the chuck. Open the chuck jaws fully and see if you can see the screw.
Does the chuck seem loose on the actual drill? It can be tightened by turning this screw anti-clockwise. If you can’t see a screw in there it may be held on by other means or it may not be the issue. Worth checking this before moving on.
Why Does My Drill Keep Stopping?
So you have tried all the above you realize the chuck is tight and the actual drill continues to stop spinning.
A drill may stop spinning if the internals of it is damaged and needs replacing. Due to the cheap cost of drills these days, it may be cheaper to buy a new drill than replace its parts.
This is not always the case, so if you wish to look further into why your drill is not spinning, I have listed the steps below to get it working again.
Innocent Mistake: The Switch
Sometimes, people just forget to flip the switch properly. Some switches on these drills can be turned on, off, or put in neutral. In some instances, people think that they have the switch in the on position. It may have been stuck in the off or neutral position after all. Check the switch, maybe you just didn’t move it well enough.
However, if the switch is in the right position and your drill isn’t moving at all, then you may have a battery or power problem. Well, it’s either that or you have a broken switch. If you’re sure that you have a fully charged battery (for cordless drills) and you have power from the strip, then you should have the switch replaced.
Power Problems
If you’re using a cordless drill, then one probable reason why your drill has stopped spinning is that the battery ran out of juice. The two trouble points that you can test are:
- The charger
- The battery
To test the charger, you need to use a multi-meter. You need to plug the charger into an outlet. A multi-meter is a device or tool that has two metal probes.
You use it to test for an electrical charge. You can order one from Walmart, Amazon here, or other suppliers. If you are not confident with this, then take it to your local electrician for an inspection.
Next, plug the probes into the charging slots in the drill’s charger. Be careful not to touch the metal ends of the probes or the charging slots. Turn the probe on and check how much electricity is coming in.
Do the same for the battery. Test the connectors with the multi-meter. Note that if the meter shows zero either on the battery or on the charger, then that part needs to be replaced. To help you see how this is done, check out this video:
Don’t Have a Multi Meter?
Grab the multimeter that I use which is easy to use.
The good news is that many cordless drills are usually sold with a backup battery. You can then remove the battery currently installed on your drill and replace it with your backup. You can then charge the previous battery while using the new one.
If you don’t have a secondary battery or the battery is fixed onto your drill, then you will have to charge it for a few minutes. After the battery has been charged, you can then use the drill.
If you’re using a drill with a cord, make sure that there is power coming from the outlet or power strip. Unplug your drill, get another appliance, and plug it in the same socket. Turn the appliance on. If the appliance turns on and works, then your drill may not be getting any electricity.
The power issue may also be caused by a faulty power cord. To test this, follow these steps:
- Plug your drill into the wall socket and then turn it on.
- Grab hold of a section of the cord—the one near the outlet—and then flex it back and forth. Make sure to bend it in different directions. If the drill spins in any of these directions, then the cord near the socket is faulty.
- If that doesn’t do anything, then this time flex that section of the power cord near the drill. Do the same test on this end of the cord. If the drill spins (or spins and stops), then this is the end of the cord that is faulty.
If you’re not too savvy with removing power cords or you don’t have a spare cord, then you may have to take your drill to a shop to have it repaired.
If the power cord or the battery isn’t the problem, then your drill may not be spinning due to something more serious. Check out the other options in the guide below.
Pulling Your Drill Apart
In the next few parts of this guide, I will show you how to replace faulty parts that prevent your drill from spinning. This will require you to remove the housing of your drill.
Take note that there are two types of drill housings:
- Clamshell type
- Stacked housing
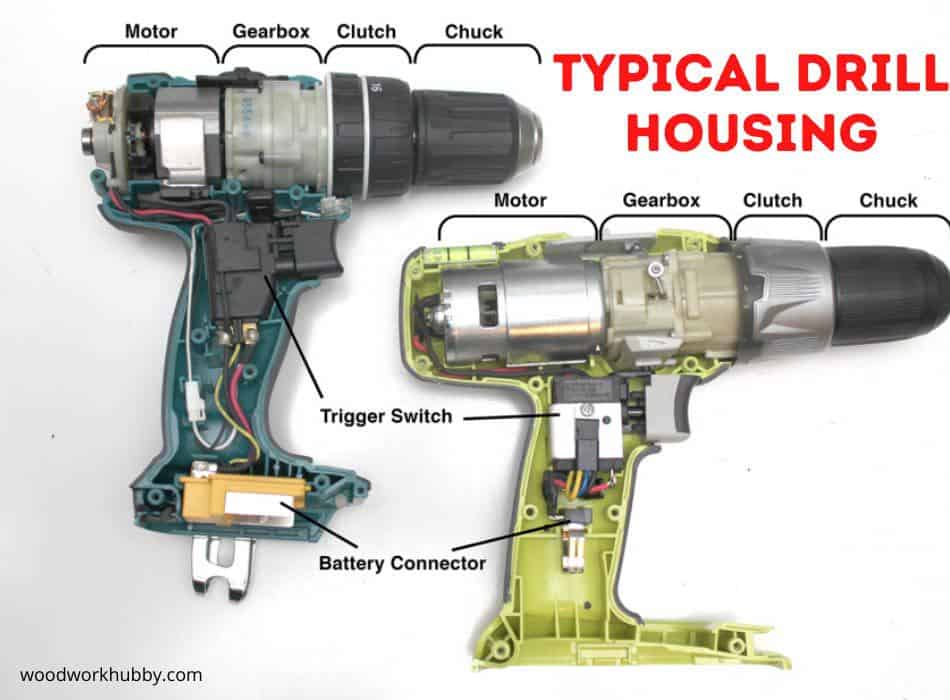
The clamshell type of housing is the most common one out there. It is made up of two plastic halves that are identical. These are the easiest to open because all you need to do is to remove the side screws.

The image above shows an open drill with the two parts of the clamshell casing side by side.
The second type, stacked housing, is a bit trickier. This type of drill case has four parts:
- Handle
- Switch housing
- Motor housing
- Gear housing
Which part of the housing should you remove first? It will depend on the model and make of your drill. Some drills will have you remove the handle first. However, there are models where you can access either the motor or gear housing without having to remove the handle.
There are many drills that will have you remove the backplate first. After that, you can pull the shaft along with the other internal parts out at the front. This YouTube video shows you the most common process to disassemble a cordless drill.
Please check the user’s manual that came with your drill before attempting to disassemble this type of drill housing.
Checking the Gear Case
The gear case is one of the parts that you will need to check, especially if the drill keeps on spinning but the chuck stays in place. The gear is made up of the clutch as well as the transmission. The gear case itself can get worn out due to regular wear and tear.
Another way to verify that the gear case is failing is when you hear some kind of grinding sound when you make the bit spin. Don’t press it against any material—just let it spin. If you hear the grinding of metal on metal, then it might be that the gear case is damaged.
The hammer function of your drill may already be faulty, which causes metal parts to grind against one another. If it’s not that, then it could be that the clutch is already slipping, which causes the grinding sound.
In any case, you need to replace the gear case. Now, as was mentioned earlier, each drill model will have a different way of removing the gear case. You should check the user’s manual just to make sure you’re doing it right.
However, the process basically begins by removing the handle first, getting it out of the way. That will be followed by the removal of the chuck.
You will need a certain type of screwdriver. Some drills will require a Philips screwdriver and some will need a flathead. Some rare models will need a hex or a star screwdriver.
Again, inspect your drill (or check the owner’s manual). You can tell by the shape of the screw that’s on the handle. Note that the chuck screws are usually at the bottom and they’re in a reverse thread.
Apart from screwdrivers, you will also need the right-sized Allen wrench to remove the actual chuck. The cover can then be removed, which will allow you to remove the gear case.
Chucks
Sometimes, it’s not the entire gear case that’s causing the problem. Sometimes, the noise will come from the chucks. If the internal parts of the chuck are damaged, then it won’t be able to grab hold of the drill bits.
If you make the drill spin for a quick inspection, you will see it spin even if the chuck isn’t gripping it properly. However, once you press it against some kind of material, then the problem will be obvious.
The drill bit will stay in place and the chucks will spin on the drill bits. You will hear the drill make its usual noises but the drill bit isn’t spinning.
If this is what you’re experiencing, then it means that the drill chuck will need a replacement. There is no workaround that you can apply here since the chuck itself is worn out.
To replace the chuck, follow these steps:
- You need to use the right type of screwdriver to remove its screw. Again, it’s usually found at the bottom. You will then need the right-sized Allen wrench to dislodge the worn-out chuck off the spindle.
- To install the new drill chuck, insert the new one into the spindle. Tighten it using an Allen wrench. And then put the screws on afterward.
Check the Spindles
If upon inspection you notice that the chuck is still able to “bite” onto the drill bit, then something else is wrong. Remember that the chuck rests on the spindle, which is the part that makes it spin.
If the drill chuck has no problems, then the next part that you should inspect is the spindle. Spindles get worn out over time as well due to regular wear and tear.
To test for a broken spindle, make sure that your drill is turned off. Remove the plug from the outlet just to be sure. After that, use your hand to spin the chuck. When you do this, you will normally feel some sort of movement in the gears. There will also be some resistance when you try this easy test.
However, if the chuck spins freely with no resistance, then the spindle is broken.
To remove the spindle, follow these steps:
- You should first remove the case, handle, and chuck. Follow the steps described earlier for removing the drill chuck. Once you have the chuck removed, there are several parts that you will have to remove to release the spindle.
- Note that the actual parts may be different for your drill. Again, check the user’s manual for the actual steps for your model. However, according to my personal experience, you will need to remove the cam plate, retaining ring, gear, steel ball, change plate, and leaf spring.
- The bearing will be a bit tricky to remove. I recommend that you use either a puller or a bearing separator to make things easier. Once you have the bearing removed, the compression spring should be easy to get to. If the spindle is stuck, use a vice grip.
Gears
The gears also get a lot of wear and tear. And with frequent use, they tend to get stripped eventually. I have observed that in some drills, the gears are placed inside a kind of housing. In some models, they’re just at the front, which makes them easier to reach and replace.
Follow these steps to inspect the gears in your drill with the housing in the front of the drill:
- You need to locate the gear housing. If it is in the front of the drill, it will be easy to access.
- Remove the screws that hold the housing in place.
- After that, remove the cover.
- Once the cover is removed, you can inspect the gears. Look for chipped or damaged gear teeth.
If the gears look damaged or have visible signs of wear and tear, then it’s time to replace them. To do that, follow these steps:
- A lot of drills have gears that can be removed from the shaft. The shaft should be easy to pull out once the cover is removed. Once you’ve pulled it out of the case, then you can work on removing the actual gears that are attached to the shaft.
- To get the all-in-one gear unit off the shaft, you need to get a bearing separator. Install it on the bearing and then place everything on a bench vice.
- Grab a hammer and gently tap on the shaft. You can use a punch with the hammer. This makes removing the bearing much easier.
- After removing the bearing, you need to take out the retaining ring.
- This will then allow you to remove the wave washer.
- After that is taken off, you can then remove the keyway and the gear as well.
- To replace the old gear, do everything in reverse. Install the keyway and the gear onto the shaft first.
- Follow that with the wave washer, retaining ring, and all the other parts. Note that you will need to use a socket on the bearing race. This will hold it in place. Use a small hammer to tap the bearing into place.
Note that before you reinstall the case cover, you should put grease on the bearing. This will help reduce wear and tear.
A Final Word – Why does my drill stop spinning?
As a final reminder, please note that you should only attempt to disassemble your drill if you completely understand the instructions outlined here or in your user’s manual. You should avoid removing any internal parts if you don’t have the right tools and if you don’t have any replacement parts.
If you don’t have sufficient DIY skills or if the necessary parts aren’t available, your best solution is to take your drill to a repair shop. Explain what the problem is, the troubleshooting you have done, and the techs there will usually know what to look for.


