Are you struggling with sanding grooves in your furniture? You’re not alone, as even I’ve faced this challenge often during my woodworking projects. After encountering this issue multiple times and researching extensively, I’ve discovered several tried-and-true techniques to simplify the process.
This article aims to share the ultimate technique for achieving a flawless finish when sanding intricate grooves on any piece of furniture – without all the frustration!
Key Takeaways
- Sanding in grooves can be challenging due to the difficulty of reaching all the nooks and crannies, but there are techniques such as using a rubber contour sander, steel wool, or modifying sandpaper that can make it easier.
- Other techniques for sanding grooves include utilizing a woodworking file, trying curved backers, using a hose sander, and creating your own DIY sander.
- Different types of grooves may require specific techniques and tools. For small or narrow grooves, folded sandpaper or specialized detailers can be effective. Chair or bedpost spindles and grooves may benefit from rotary tools with small roles sanding discs. When sanding deck boards or tongue and groove surfaces, options include wood slats wrapped with sandpaper and oscillating/orbital sanders.
Why is Sanding in Grooves Difficult?
Sanding in grooves can be challenging because it’s hard to reach all the nooks and crannies, making it difficult to achieve a smooth finish.
Video showing sanding tips on furniture
Challenges of sanding in grooves
Sanding in grooves tests the skill and patience of even seasoned woodworkers. The task proves difficult primarily because grooves tend to be narrow and small in size, making them tough to tackle with regular sanding tools or techniques.

On top of this, there’s a risk that beginners might resort to rushing the job which can cause unwanted swirl marks on your precious furniture. Let’s not forget those hard-to-reach areas where it seems almost impossible to deliver a smooth finish without spending considerable time hand-sanding each crevice individually!
Sadly, using improper techniques or skipping these tiny spaces often leads to subpar finishing outcomes that stick out like sore thumbs on otherwise beautifully crafted pieces.
With precise grit selection and equipment for sanding grooves though, you’re one step closer towards perfect finishes every single time.
Techniques for Sanding in Grooves
There are several effective techniques for sanding in grooves, such as using a rubber contour sander, trying steel wool, utilizing a woodworking file, modifying sandpaper, using a hose sander, trying curved backers, and even creating your own DIY sander.
Learn more about these techniques to achieve a smooth finish on your furniture.
Video showing how to sand difficult contours in wood
Using a rubber contour sander
I love using a rubber contour sander for the intricate grooves of my woodworking projects. It’s perfect for reaching tight corners and awkward angles, all while preserving the design and details of the furniture piece.

Available in varying sizes, choosing an appropriately sized contour sander ensures effective sanding even on different project scales. Unquestionably, its flexibility offers a substantial advantage when sanding various groove shapes and depths.
Unlike rigid tools that can distort or damage delicate designs, this tool adapts to the surface’s shape providing smooth finishes free from unsightly scratches or gouges. With this specialty tool in your workshop arsenal, you’re better equipped to tackle any groove sanding challenge that comes your way!
Trying steel wool
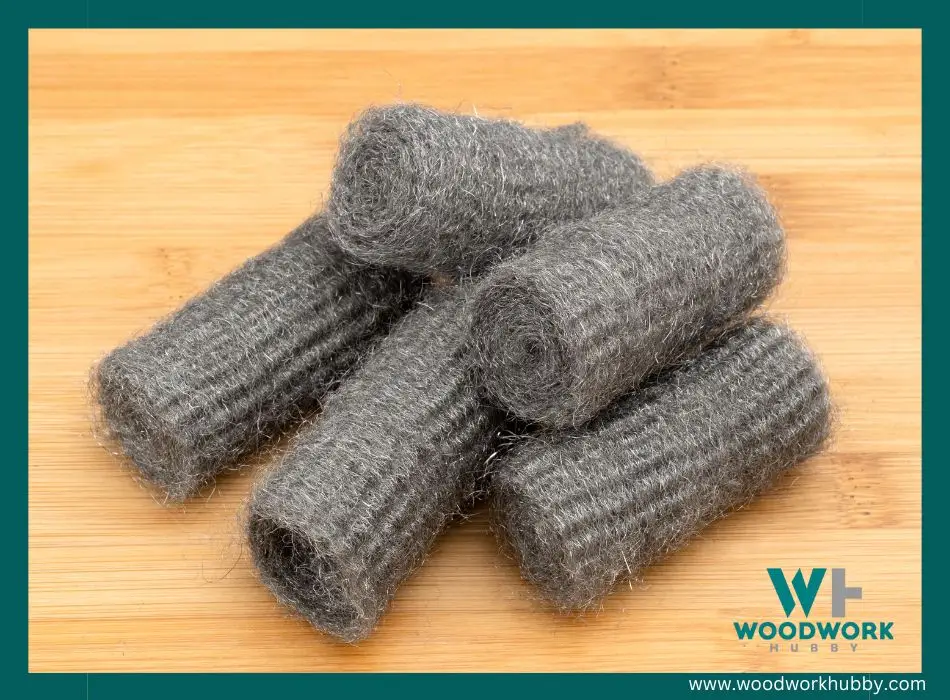
Steel wool presents a quick and efficient alternative to sandpaper when working on grooves. With its fine strands, it gently cuts into the surface of the furniture, adept at navigating both large and narrow crevices.

Its simplicity eases preparation for painting tasks. In particular, #0000 steel wool can polish a psaltery back to a high sheen, demonstrating its versatility beyond just sanding. This approach is not only easy but also offers great results in less time.
Utilizing a woodworking file
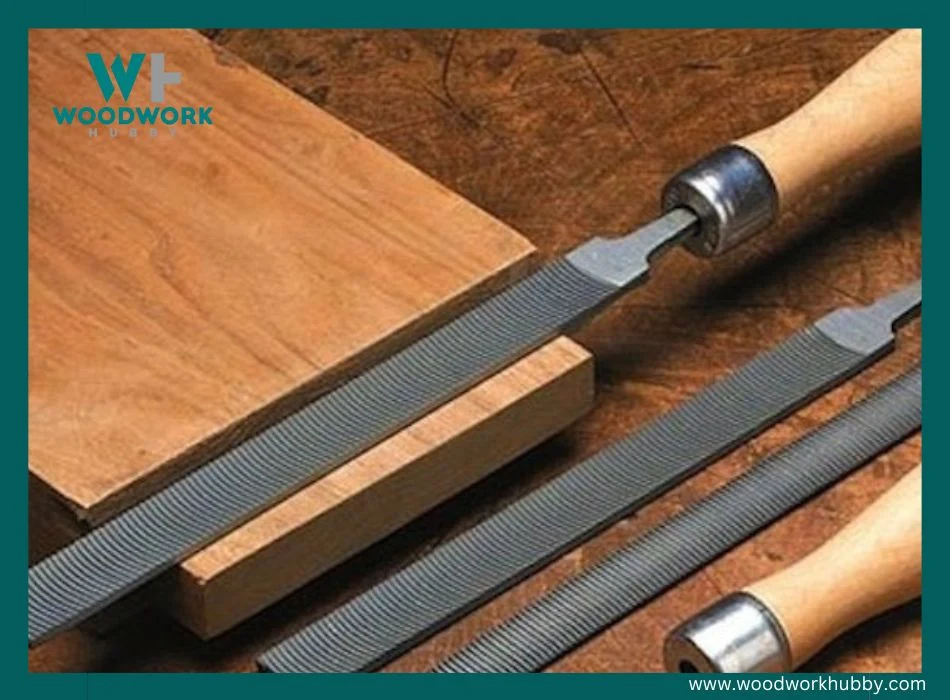
I find that utilizing a woodworking file is a great technique for sanding grooves in furniture. Woodworking files are versatile tools that can easily shape and smooth the wood in those hard-to-reach areas.

By selecting a file with the appropriate size and shape, you can effectively remove any rough or uneven surfaces from the grooves. The process is simple – just run the file along the groove, applying steady pressure until it becomes smooth.
This method works well for both narrow and wide grooves, making it a practical choice for any furniture project.
Modifying sandpaper
When sanding in grooves, modifying sandpaper can be a helpful technique. One way to modify sandpaper is by wrapping it around the point of a wedge, creating a pointy-shaped sanding block.
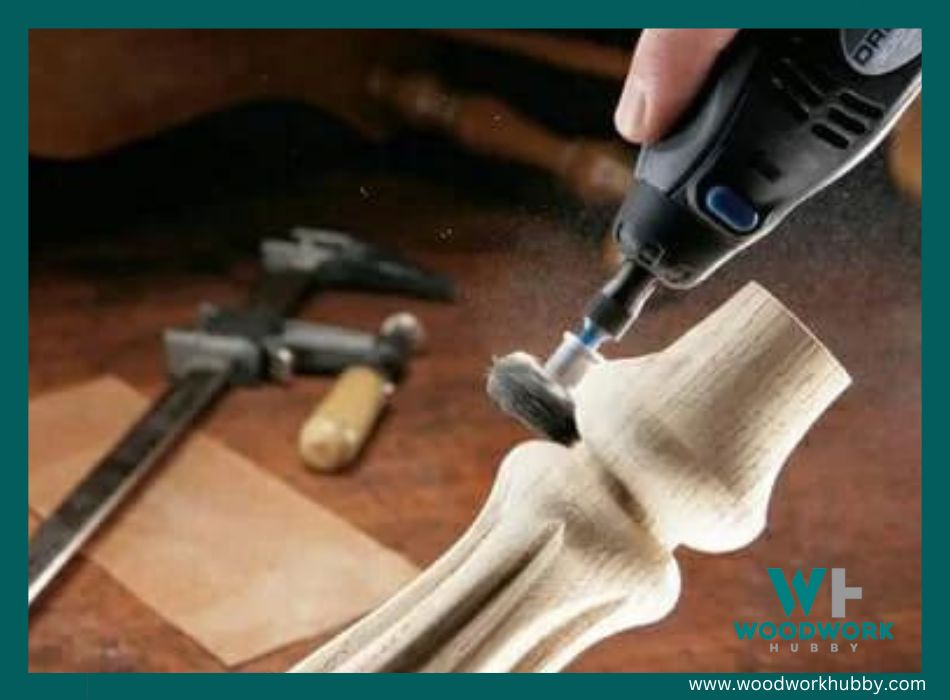
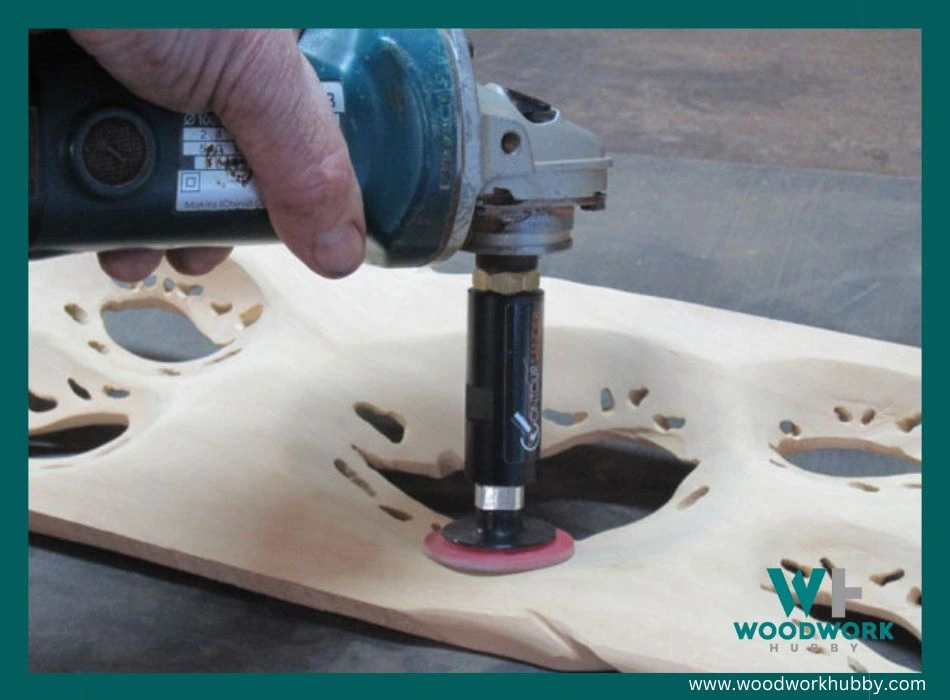
This allows for easier access and maneuverability in small and narrow grooves. Another option is to use rotary tools with small roloc sanding discs, which can provide faster and more efficient sanding in grooves.
By modifying your sandpaper or utilizing specialized tools, you can achieve smoother results when working on detailed furniture pieces. Remember to consider different grit levels of sandpaper based on your specific needs, such as coarse grit for removing tough paint or stain, and medium grit for precise groove sanding.
Using a hose sander
I love using a hose sander when sanding grooves in furniture. It’s an effective technique that makes the process much easier and more efficient. The hose sander, like the SurfPrep 3×4″ sander, is perfect for reaching corners, grooves, and details.
It can even remove paint from the grooves! With an electric sander like this, sanding in grooves becomes hassle-free and low-mess. Plus, it’s essential to choose the right sander for this task to achieve a smooth finish on your furniture pieces.
So don’t forget about the power of using a hose sander when tackling those difficult-to-reach areas!
Trying curved backers
When sanding grooves in furniture, one technique that can be effective is trying curved backers. Curved backers, such as scraps of styrene or dowels, can provide support and make it easier to sand the curved surfaces of grooves.
They help to ensure even pressure across the groove, resulting in a more uniform finish. Additionally, spline slides made from tempered material can serve as effective backers for sanding grooves as well.
By using these curved backers and choosing the appropriate backing materials, you can achieve smoother and more consistent results when sanding furniture edges and other curved surfaces.
Using a DIY sander
I find that using a DIY sander is an effective method for sanding grooves in furniture. By creating a custom sanding tool, you can easily reach into narrow crevices and ensure even sanding.
One way to make your own DIY sander is by wrapping sandpaper around the end of a wedge or similar object, creating a pointy-shaped sanding block. This allows you to get into small and narrow grooves with precision.
Remember to use fine-grit sandpaper and apply even pressure as you move the DIY sander along the groove for best results. With this technique, you can achieve smooth and polished surfaces on your furniture pieces.
How to Sand Specific Types of Grooves
In this section, I will discuss various techniques for sanding specific types of grooves, including small or narrow grooves, chair or bedpost spindles and grooves, and deck boards or tongue and groove.
Sanding small or narrow grooves
Sanding small or narrow grooves can be challenging, but there are techniques that can help you achieve smooth results. Here are some tips for sanding small or narrow grooves:
- Use folded sandpaper to get into tight spaces.
- Wrap sandpaper around the point of a wedge to create a pointy-shaped sanding block.
- Try using sanding detailers, which are flexible tools designed specifically for sanding narrow areas.
- Sponge sanders wrapped around concave and convex rubber pads can also be effective for reaching into small grooves.
- Consider using woodworking tools like rotary tools fitted with small roloc sanding discs for efficient and precise sanding.
Sanding chair or bedpost spindles and grooves
Sanding chairs or bedpost spindles and grooves can be a tricky task. But with the right techniques and tools, you can achieve a smooth finish. Here are some tips:
- Use a rotary tool with small roloc sanding discs to quickly and efficiently sand the curves of chair spindles and bedposts.
- Consider using sanding detailers or sponge sanders wrapped around concave and convex rubber pads for better control and access to tight spots.
- If you need to sand grooves in decking, try wrapping sandpaper around a wood slat that fits loosely into the groove. This will help you reach those hard-to-reach areas.
- For small and narrow grooves, create a pointy – shaped sanding block by wrapping sandpaper tightly around the point of a wedge. This will allow you to get into tight spaces with ease.
Sanding deck boards or tongue and groove
Sanding grooves in deck boards or tongue and grooves can be a challenging task. However, with the right technique and tools, it can be made easier. Here are some tips for sanding deck boards or tongue and groove:
- Use a wood slat wrapped with sandpaper: One common method is to wrap sandpaper around a wood slat and use it to sand the grooves. This allows you to reach into the tight spaces between the boards.
- Thin folded strips of sandpaper: Another option is to use thin folded strips of sandpaper for hand sanding. Although it may take more time, it allows you to get into the narrow grooves.
- Rotary tools with a small roloc sanding disc: A rotary tool with a small roloc sanding disc can be an effective and efficient way to tackle grooves in deck boards or tongue and groove. It allows for precise sanding in hard-to-reach areas.
- Standard belt sander: If you have a lot of grooves to sand, using a standard belt sander can save you time. It covers a larger area and provides quick results.
- Wedge-shaped sanding block: For small and narrow grooves, creating a wedge-shaped sanding block by wrapping sandpaper around the point of a wedge can help you reach those tight spaces.
- Oscillating or orbital sander: If your deck has grime, old stain or paint that needs to be removed before sanding, using an oscillating or orbital sander is recommended. It will not only remove the unwanted substances but also give you a smooth finish.
Tips and Tricks for Sanding Grooves
Sanding small crevices by hand, tackling grooves in cabinet doors, and reaching hard-to-reach areas – discover expert tips and techniques for achieving a flawless finish when sanding grooves in your furniture.
Sanding small crevices by hand
Sanding small crevices by hand can be a challenge, but with the right technique and tools, it can be done effectively. Here are some tips for sanding small crevices by hand:
- Use fine-grit sandpaper: Using fine-grit sandpaper, such as 220 or higher, is recommended for sanding small crevices. It helps to achieve a smooth finish without causing any damage.
- Use a sanding block: To ensure even pressure while sanding, use a sanding block. It provides stability and helps to distribute pressure evenly across the surface.
- Wrap sandpaper around a wedge: For narrow grooves, you can create a pointy-shaped sanding block by wrapping sandpaper around the point of a wedge. This allows you to reach into tight spaces and achieve precise results.
- Folded strips of sandpaper: For certain types of grooves, such as those found in furniture details, thin folded strips of sandpaper can be used for hand sanding. They can easily fit into small spaces and provide the necessary abrasion.
- Lightly sand in grooves and details: When working on detailed furniture pieces, use a finer-grit sandpaper and lightly sand in the grooves and details. This will help to maintain their integrity while still achieving smooth surfaces.
Sanding grooves in cabinet doors
Sanding grooves in cabinet doors can be tricky, but there are effective techniques to get the job done. Here are some tips and tricks:
- Use rotary tools fitted with small roloc sanding discs for fast and easy sanding.
- Hand sand the grooves with thin folded strips of sandpaper, taking your time to ensure thorough sanding.
- Wrap sandpaper strips around a pencil or similar object to reach into narrow grooves.
- Opt for fine – grit sandpaper wrapped around a foam brush or sandpaper block, and always sand in the direction of the grain.
- When dealing with detailed furniture, use a finer – grit sandpaper and lightly sand the grooves and details.
- For small and narrow grooves, create a pointy – shaped sanding block by wrapping sandpaper around the point of a wedge tool.
Sanding hard-to-reach areas
Sanding hard-to-reach areas can be challenging, but there are effective methods you can try. Here are some tips and tricks for sanding grooves:
- Use rotary tools: For fast and easy sanding in hard-to-reach areas, attach a small roloc sanding disc to a rotary tool.
- Try folded strips of sandpaper: When hand sanding in difficult-to-reach areas, fold thin strips of sandpaper and use them to reach into tight spaces.
- Consider liquid sandpaper: Liquid sandpaper is a great alternative to traditional methods for sanding hard-to-reach crevices. Simply apply it with a brush or rag and let it do the work for you.
- Use finer-grit sandpaper for detailed furniture: When sanding intricate pieces with lots of grooves and details, opt for finer-grit sandpaper. Lightly sand in the grooves to achieve smooth finishes.
- Create a pointy-shaped sanding block: To tackle small and narrow grooves, wrap a piece of sandpaper around the pointed end of a wedge to form a specialized sanding block.
Choosing the Right Sanding Equipment and Materials
When choosing the right sanding equipment and materials for sanding grooves in furniture, it is important to consider the grit selection and tools that will work best for the specific grooves you are working on.
Grit selection
Choosing the right grit for sanding grooves is crucial for achieving the desired results. The grit refers to the size of the abrasive particles on the sandpaper, and it determines how rough or smooth the surface will be.
When sanding grooves in furniture, it’s important to consider the material you are working with and the level of finish you want to achieve. For coarse sanding or paint removal, a lower grit such as 40-60 is ideal.
Use finer grits like 120 or 220 if you’re looking for a smoother finish. Sandpaper grit charts can help you find the appropriate type of sandpaper for your specific project.
Tools for sanding grooves
I highly recommend using the SurfPrep 3×4″ sander for sanding grooves in furniture. It is specifically designed to access corners, grooves, and details, making it the best tool for this task. Additionally, it excels at removing paint from furniture surfaces.
- Hand sanding with folded sandpaper: This method allows you to have better control and precision when sanding grooves in furniture.
- Sanding detailers: These specialized tools are designed specifically for sanding grooves and intricate details on furniture.
- Sponge sanders wrapped around concave and convex rubber pads: These tools adapt well to curved surfaces and are effective at sanding grooves.
- Rotary tools with small roloc sanding discs: These tools provide efficiency and effectiveness when it comes to sanding grooves in furniture.
Conclusion – Ultimate Technique To Sand Grooves in Furniture
In conclusion, sanding grooves in furniture can be a tricky task, but with the right techniques and tools, it can be accomplished with ease. Whether you opt for a rubber contour sander, steel wool, or even a DIY sander, finding the method that works best for you is essential.
Remember to always sand in the direction of the wood grain and take your time to achieve that smooth and flawless finish. With these expert techniques and tips, you’ll soon be mastering the art of sanding grooves in furniture like a pro!
FAQs
1. What is the ultimate technique to sand grooves in furniture?
The ultimate technique to sand grooves in furniture involves using sanding blocks or foam brushes along with fine-grit sandpaper to carefully and evenly sand the grooves.
2. How do I ensure that the grooves are sanded smoothly?
To ensure smooth sanding of grooves, it is important to choose the right size and shape of sanding tool that fits into the groove properly. Additionally, applying light pressure and using a back-and-forth motion can help achieve an even finish.
3. Can I use power tools for sanding grooves in furniture?
While power tools like rotary tools or oscillating multi tools can be used for the initial rough shaping of grooves, it is recommended to switch to manual hand tools like sandpaper or foam brushes for finer and more precise sanding within the narrow grooves.
4. Are there any safety precautions I should take while sanding furniture grooves?
It is important to wear protective goggles and a dust mask while working with wood and performing any type of sanding. This helps prevent eye injuries from flying debris and reduces inhalation of harmful dust particles.


